Showing posts with label 6mm. Show all posts

Monday, September 16

Battletech Riever

This last week I completed some models for Ral Partha Europe.  They are a selection of Battletech Aerotech aircraft including the Riever and Slayer miniatures. I really like them and although they are a little over-sized for normal 6mm scale they work for me and I would be happy playing them in a mech game.

I was trying to simulate a veteran level of wear and tear on these Battletech aerospace vehicles from continued atmospheric re-entry. A long tour of duty has taken its toll on the heat resistant fuselage.  I gave the cockpits a very subtle jewel look along the bottom edge but kept the majority of the canopy matt black.   This was intended to make it look like the glow was from within the canopy, rather than an external reflection.   I also added tiny white dots using thinned white paint to make it look like instruments lights shining through the canopy.  I am happy for a first attempt using a different cockpit style with more of a glow than a jewel.

You can see what paints I used and more detail on the paint jobs in the youtube video link below.

Battletech Riever Miniature 

Video overview here: 

Thursday, May 9

Weathering Tyres.


This is a large photo guide to the work in progress on the GHQ modern tanks.  I am experimenting with dust/mud weathering on the rubber tyres.   

Given the small size of 6mm wheels I am looking for something that looks good in the tiny scale, whilst still being quick to paint.  Just making them all very dark brown would be overkill I think and in the small scale you would end up loosing the amazing detail on these GHQ models. They really do have the correct tyre tread for the vehicles like these Stryker M1129 Mortar Carrier and the Stryker M1134 Anti-Tank missile carriers.

The initial start of just painting the wheels in Lifecolor tyre black was a challenge in brush control and I think you can imagine that around thirty 4 and 8 wheeled models results in some serious wheel painting time.  I did not want to paint directly over the wheel hubs, so it was a careful job of painting the lifecolor paints onto the tyres and not covering up the hubs which had been airbrushed as part of the main paint job. 

I completed a few test trials with different washes and dust filters to try and get it right. The end result uses the Lifecolor Dust type 2 wash over the tyre black but thinned down with about 4/5 parts water. This makes the dust go into the tiny grooves in the tyre tread, rather than coating the full wheel which would cover up the nice rubber base colour.   I used the Smoke-Brown wash from Lifecolor to slightly darken the result like a filter over the dust.    Finally I experimented with the games workshop "Agrax Earthshade" (Which is bit like the old Devlan mud) to add a much deeper and darker wash to the undercarriage and areas of the hull which face the ground and might therefore have had a splash of dust and mud.   I think I will be sparing with the Agrax wash because it almost covers up the dust in the tyre grooves.

So the lesson learnt here really for me is just to have an epic amount of patience for painting the base coat on the tiny wheels.   The longer you spend getting the base tyre colour on the model the better the final result will be.

These miniatures still need work on the stowage, more weathering on the hull and around exhausts and then finally the base needs to be completed. Currently the bases are just the airbrushed colours which overflowed from the miniature during the first airbrushing phase. They will eventually be a desert colour with some reddish brown pigment, static grass and painted gravel rocks.

Here is the large format overview of this last wheel painting stage.

Clicking this photo will give you a larger image where you can see the detail. You may need to hit the magnify button when the image loads in your browser. 
Large image of painted 6mm tanks.
GHQ Vehicles and some Battletech in 6mm scale.

Friday, April 26

6mm Progress on GHQ 6mm


I have been continuing to build a 6mm force with my friend Jonathan Rogers.  Jonathan is building a set of Brigade Pacfed Grav tanks, whilst I am using various modern models from GHQ.

I now realise how lucky Jonathan is with his grav based army because I have started work on the tracks. These take a lot of time and so far I have only completed half a dozen models with a black base coat.  After completing the tracks on about 30 miniatures I will be able to finish off some further weathering, streaking and scratches to the paint work.

You can see in the photo below that the addition of the black base coat to the tracks has already greatly increased the sweetness factor of the models. A nice contrast that I don't want to completely lose when I dry brush metal and weather the tracks.


My advice and plan for future 6mm tracked models would be to paint the tracks before basing.  I usually always base during the early prep process, adding detail, gravel etc and gluing the model down. In fact the metal base means that I can use magnets on stands to help paint and airbrush the model which you can see in the video below, which is a strong reason to base early. However now I reach the track painting stage it is very difficult to get a brush in onto the track, especially where the tracks are resting into the sand base.  I do complete the painting on the bases last though and static grass is added after the dull coat.  In these models the bases are still not finished and will only be painted in desert colours after the rest of the paintwork and weathering is complete.

I am sure it is going to work out well but will take me more time than expected.

In this video below you can see the APC's and vehicles with wheels are aslo improved when the wheels are painted.  I now wish my entire force had wheels because it would be quicker than painting all the tracks!

In this miniature painting tutorial guide video, you can see these models in progress and at the stage where I dry brushed the hulls to bring out the small 6mm details.

Monday, January 17

Old Crow 15mm - Workshop visit.

Tonight I visited the workshop of Old Crow Models in the UK. They have a workshop near Croydon, South of London and I had a tour of the facilities whilst looking at some of the new models and production methods used.

Jez the owner of Old Crow showed me various models in progress and some of the interesting materials used for initial model making before they are cast into final production.

One of the most interesting items in the line up was the 6mm Hammers Slammers tanks which look stunning.  If you are a fan of Hammers Slammers you will find the models are almost identical in detail levels to their bigger 15mm and 28mm versions.

Some of the models in the photo below are pre-production casts and the metal versions here with the limited detail on the skirts are being replaced with fully detailed resin casts which are nearly ready to be loaded on the web site.  The hover skirts detail is on all of the final production models which are stunning and are a combination of a resin hull and metal turret.

Hammers Slammers 6mm Scale Miniatures

For more details of the excellent Old Crow ranges of models in 15mm and 6mm, visit the site here: http://www.oldcrowmodels.co.uk/

Old Crow Tanks

You can see some of the 15mm range here with two Tracked APC's above and the Dragoon halftrack sporting a nifty RAC, which has two detailed metal wheels fitting onto the resin half-track hull.

Old Crow Tanks

Here are the profile cards for the two Old Crow models detailed. You can see how the 12 damage points on the Dragoon can not match the Lancer with 20 damage blocks, so the heavier Lancer APC is going to be on the battlefield for longer before it is totalled. The Rotary Auto Canon (RAC) on the Dragoon also provides a rapid fire option for anti infantry fire when stationary. When the C critical box's are filled during damage there is a chance that a key system is knocked out (full details in the rules).

The Lancer APC benefits from a heavier weapon mount, so it can potentially do more damage to tanks and other support vehicles. Both the Lancer and Dragoon are built to carry squads, with the 2 transport slots on the Lancer offering space for two Gruntz Squads or a mix of Gruntz and specialist support units.


These are both v0.6 cards for the free PDF rules download and are now a bit out of date with vehicle cards and details updated since their release, however if you are just trying the rules they are ready to play and these cards (along with those on the Yahoo Group) will give you an initial feel for the game.


Sunday, October 25

6mm Battlecars

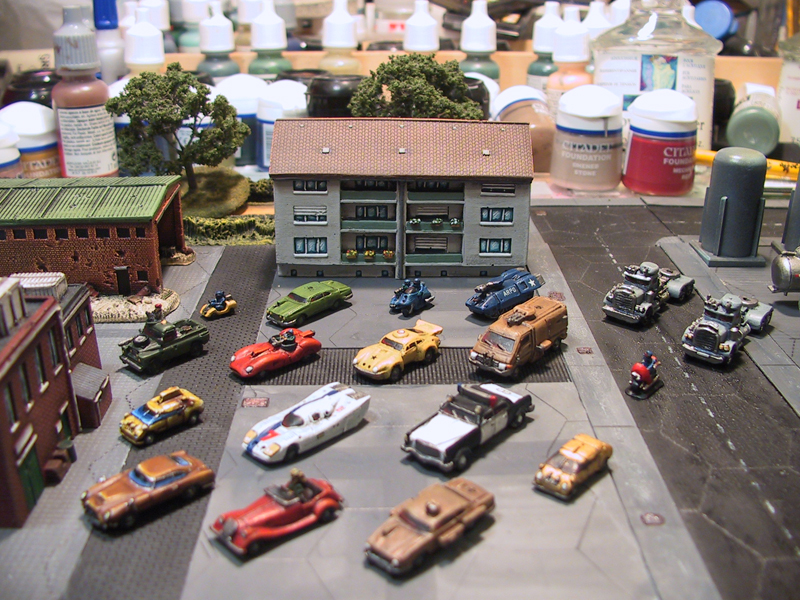
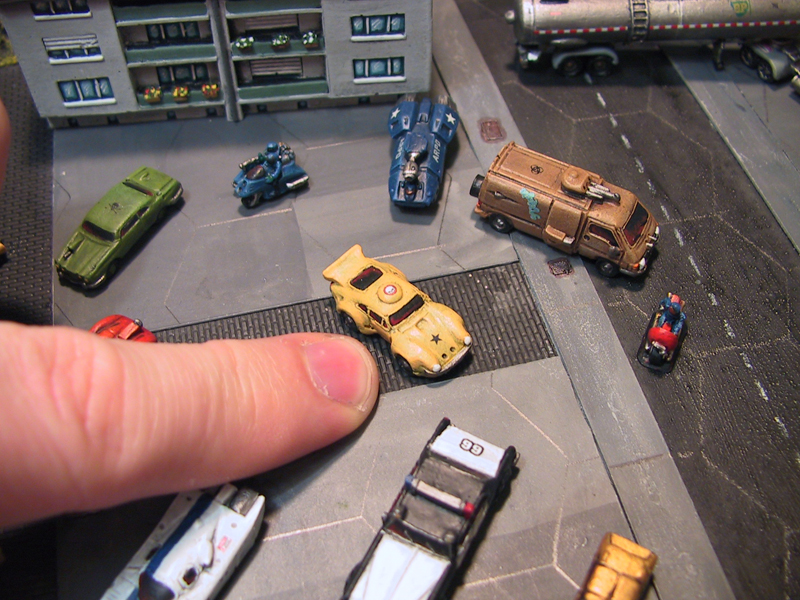
I used various 6mm models in Battletech games and I completed an obsessive phase of my life in a search of quality 6mm scale cars and trucks which would suit Battletech. There are some interesting scale models that you can find on architectural model making supply sites but they tend to be bland looking in comparison to the out of print GW range. 

In these photos you can see the 6mm Games Workshop battlecar range with some buildings from Timecast. Timecast produce a great range of 6mm, 10mm and 15mm buildings for a mix of historical periods and I find most of the 20c modern buildings are perfect for SCI-FI or modern gaming in 6mm. The terrain boards are plasticard with different textured card I layered to provide a city look.  The trees in the background are from Realistic Modelling who have some the finest pre-made trees in 6m, 15mm and 28mm. Realistic Modelling also build terrain boards to order, the quality is close to architectural modeling.


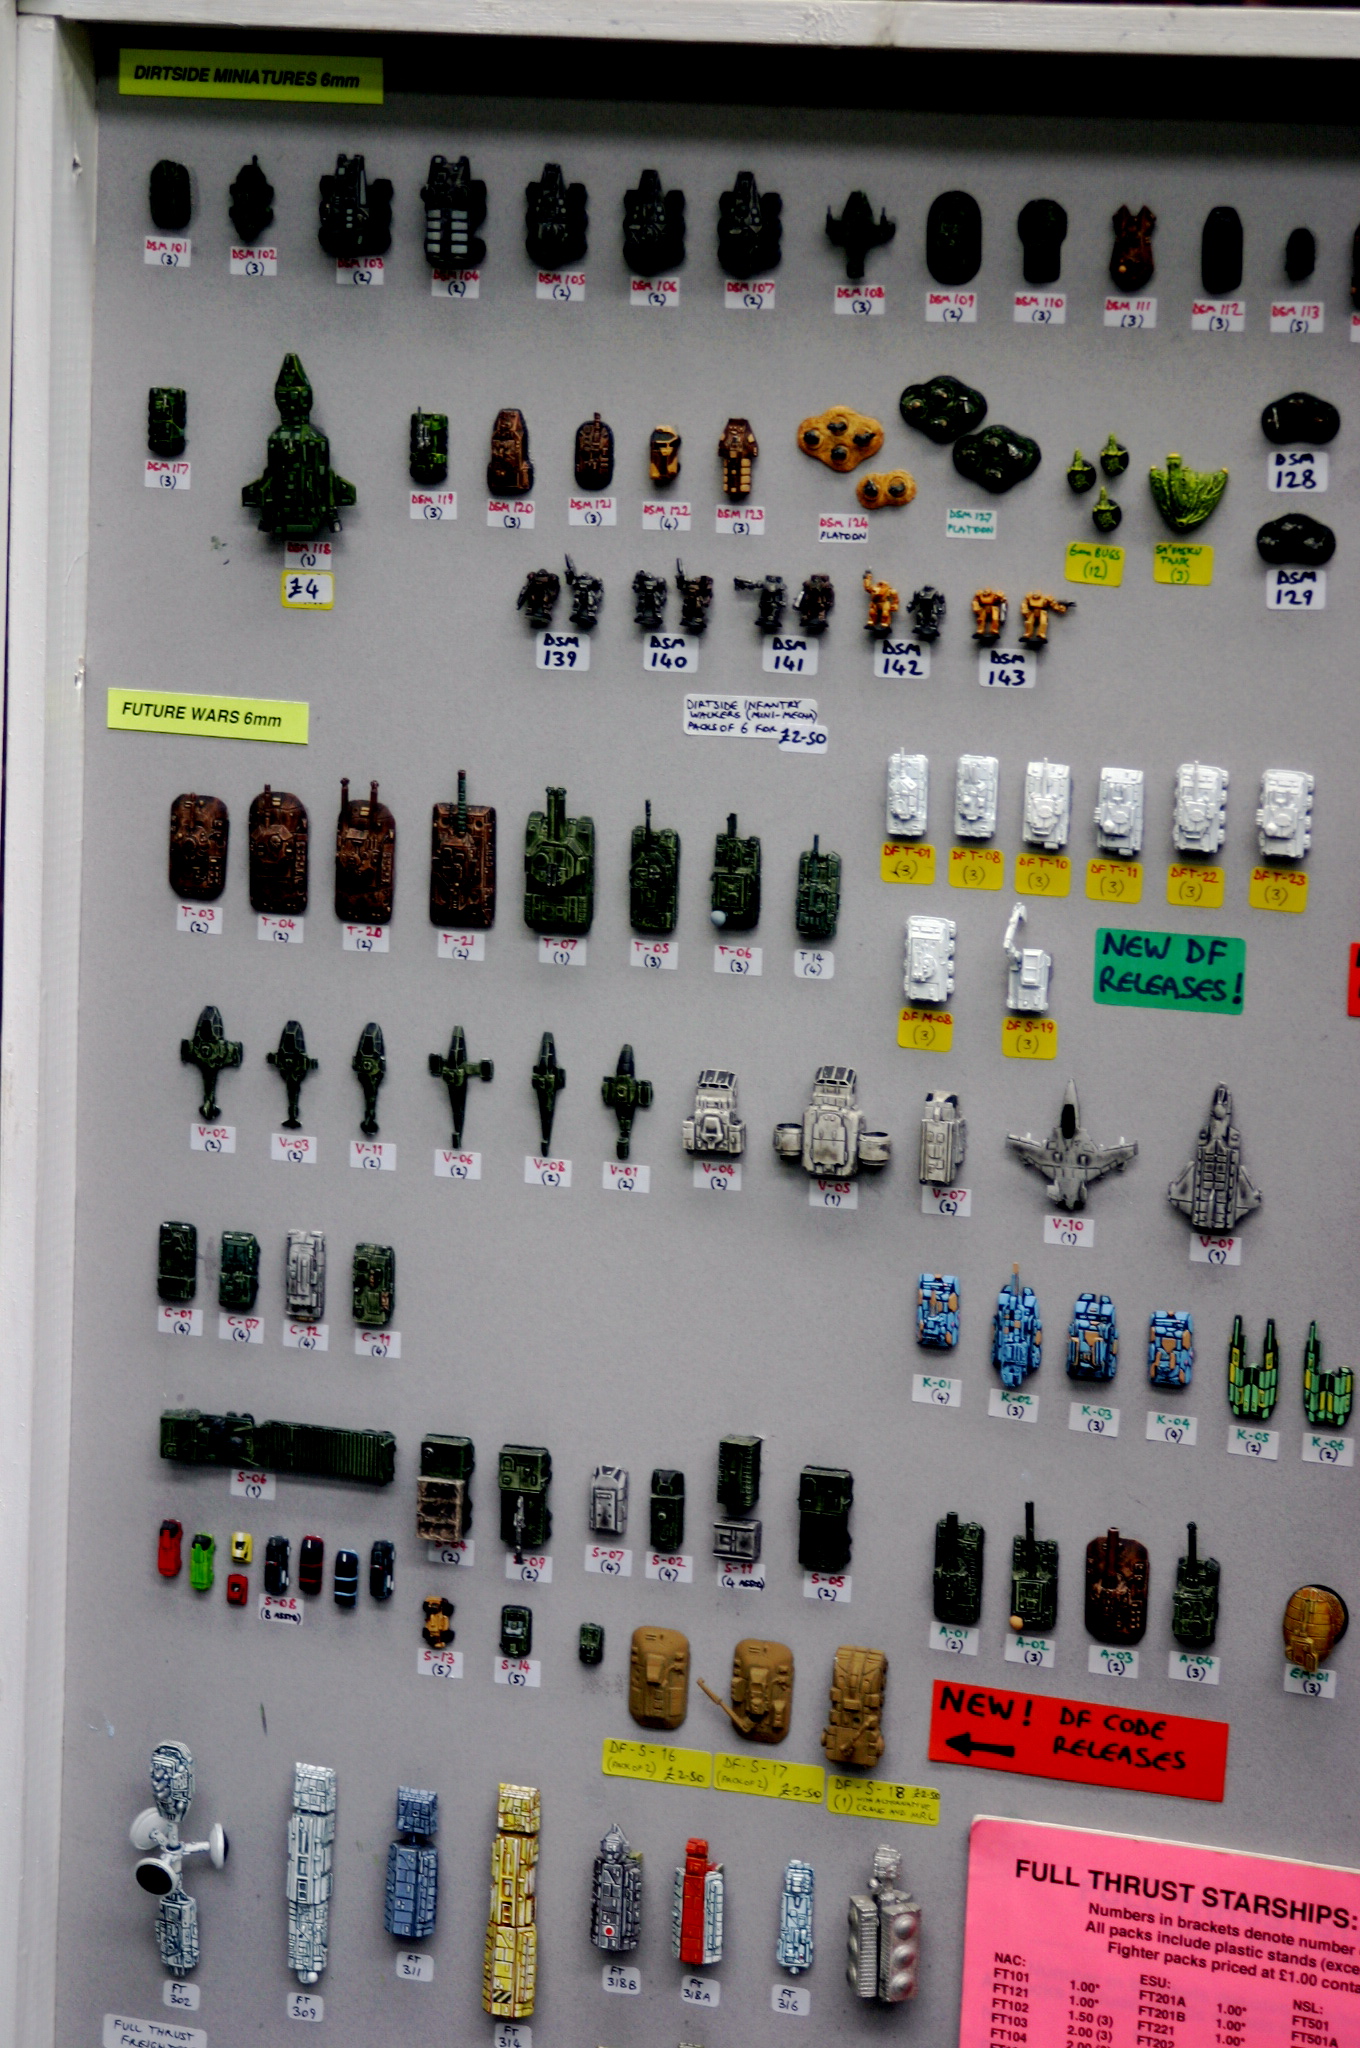
GZG 6mm Dirtside figures

For those interested in 6mm from GZG here is a very large photo of the range with codes. It is a couple of years out of date, however most of the range are visible. Click to see the large image.